Selfies are something that has developed immensely over the last 10 years especially. The development of technology, eg mobile phones is allowing any person, from wherever they are in the world to take a photo of themselves, usually using a front camera, and post it onto social media. Whether it be celebrities on the beach, travellers stood in front of waterfalls or even just an #OOTD (that means outfit of the day for you old folk)
I’ve taken many selfies in my time, in fact probably too many. However, never professionally. And our new task is to create selfies, of ourselves, experimenting with light and colour etc. Except, I’m not one to go for mainstream ideas and I don’t want to just take a ‘good’ photo of my face. As always, I want to push the boundaries and do something different. With this in mind, I’ve been doing some research on selfie photographs that have done something unique with their approach to the ‘selfie’ world.
So, lets start from the beginning. The first ever selfie was taken by Robert Cornelius in 1839.
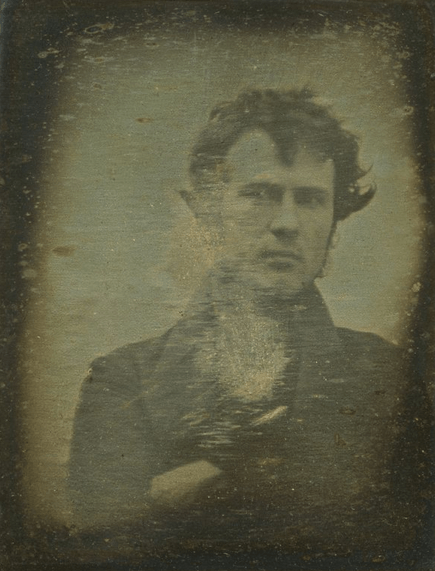
Perhaps not the best photo in the world, but during this time, this was something hugely rare! Cornelius was a chemist and photographer and has set up his own studio in the back of a family shop. He took his photo using an incredibly old technique called ‘pin hole’ camera. A pin hole camera was essentially a cardboard box that you’d seal tight so it was completely black inside. You would stick a piece of photographic paper inside on one side of the box. in the lid, you’d make a hole, depending on which aperture you were using depended on the size of the hole. You would then place the box in position with the subject ready and then you’d expose the hole to the paper in the back for a specific amount of time. This would then be sealed shut again, taking into a dark room and put in chemicals to develop.
RESEARCH
For my ‘selfie’, I didn’t want to just take a photo of myself, cause to me, that has limited skill. I definitely belong behind a camera and am not a natural poser and in fact possibly the most unphotogenic person ever. With this in mind, I looked into ways I could change my initial appearance to enable the image to have a subtle message. Firstly, I looked into face art, to gain inspiration for how I could use paint to create this disguise.
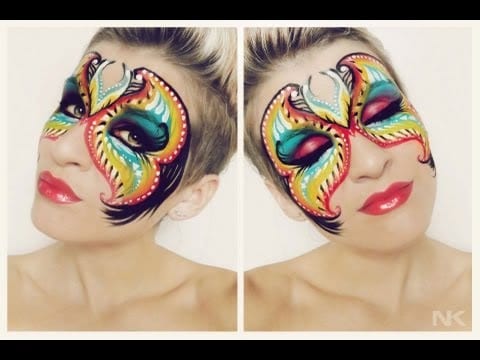
I found with this research that there are thousand of different types of painted masks that all create different feelings.
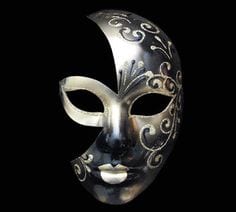
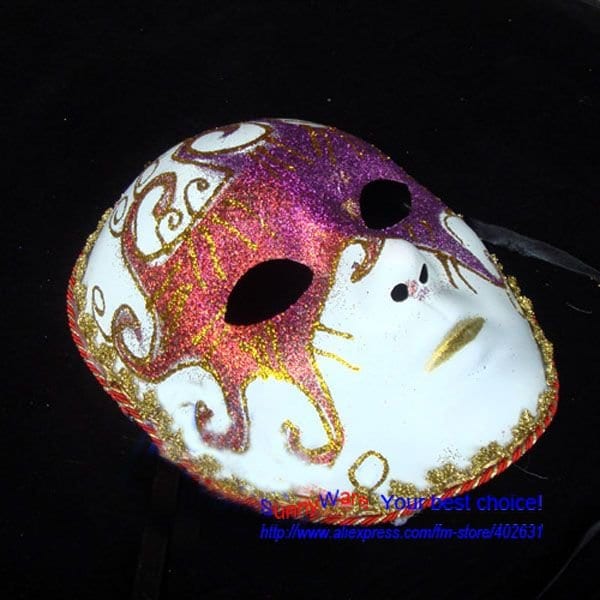
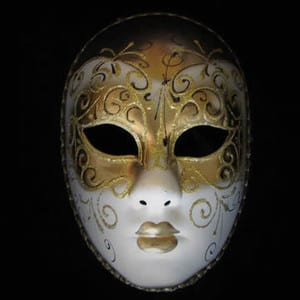
These pottery like masks are famous all about the world and are used in balls or special ceremonies where women disguise their face with something like this. The unique detail and colour attracts the man, or in this case the audience. With it in mind that I’m not comfortable being bare in front of the camera, I was thinking of ways this could be incorporated into my photography. I didn’t want to go out and buy a mask, so decided to look into similar designs but using paint directly on the fact.
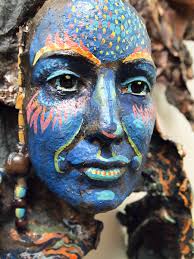
Within this research, I became aware of a very smudgy, paint look on faces that was used by many artists/photographers. Of course this was something I needed to paint onto myself, which was going to be a challenge given that I’m not great at drawing. These are some of the designs that I liked the look of.
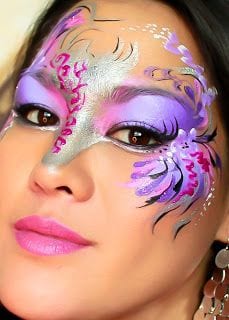
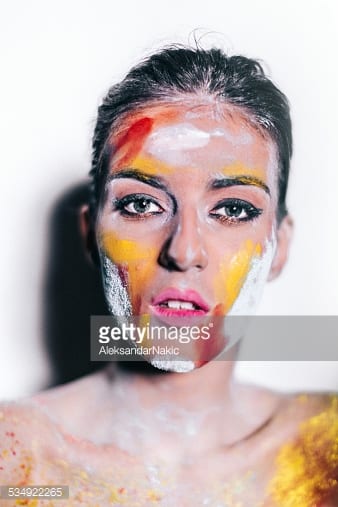
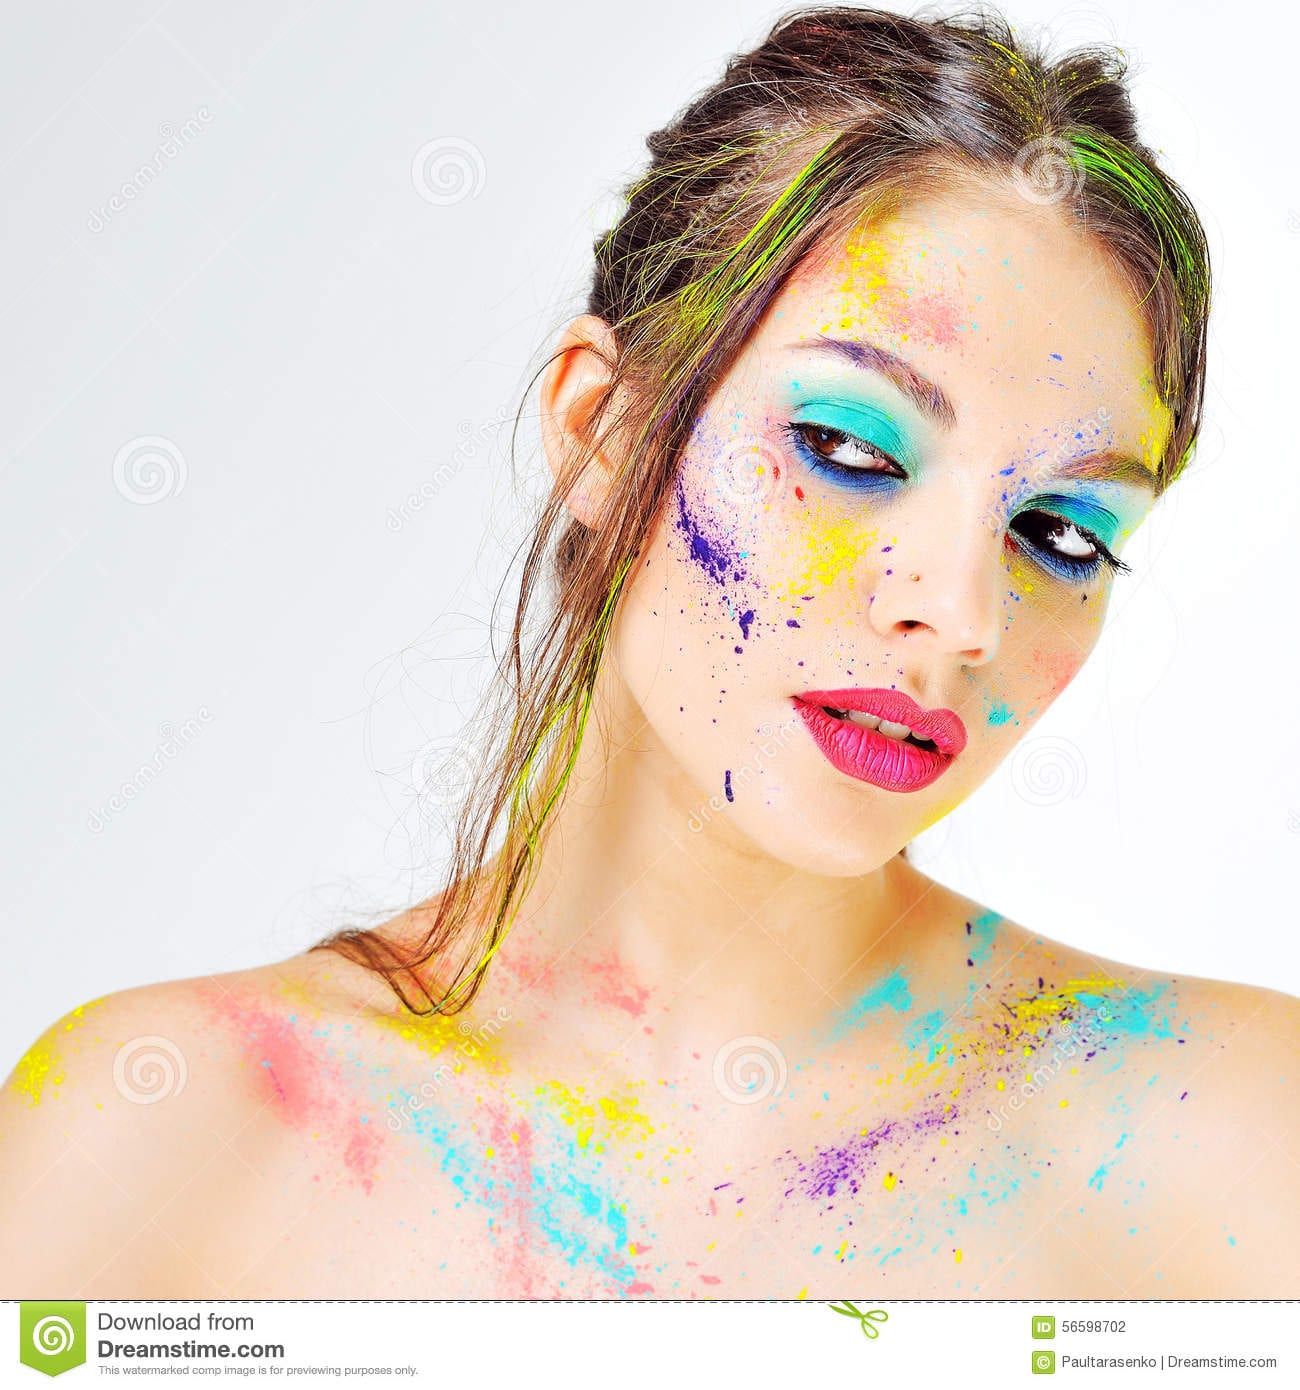
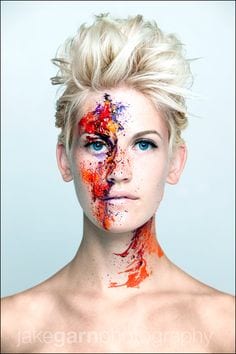
Once I decided on a basic design of the face, I needed to decide on colour. I’m allergic to red pigment so red, pink and orange were a no go. I knew I wanted the main part of colour to be around my forehead and this was what would make it obviously a mask. I researched into other coloured face paint and found a beautiful photoshoot of a young woman. The photographer is unknown which is a shame because I would have loved to see more of their work.
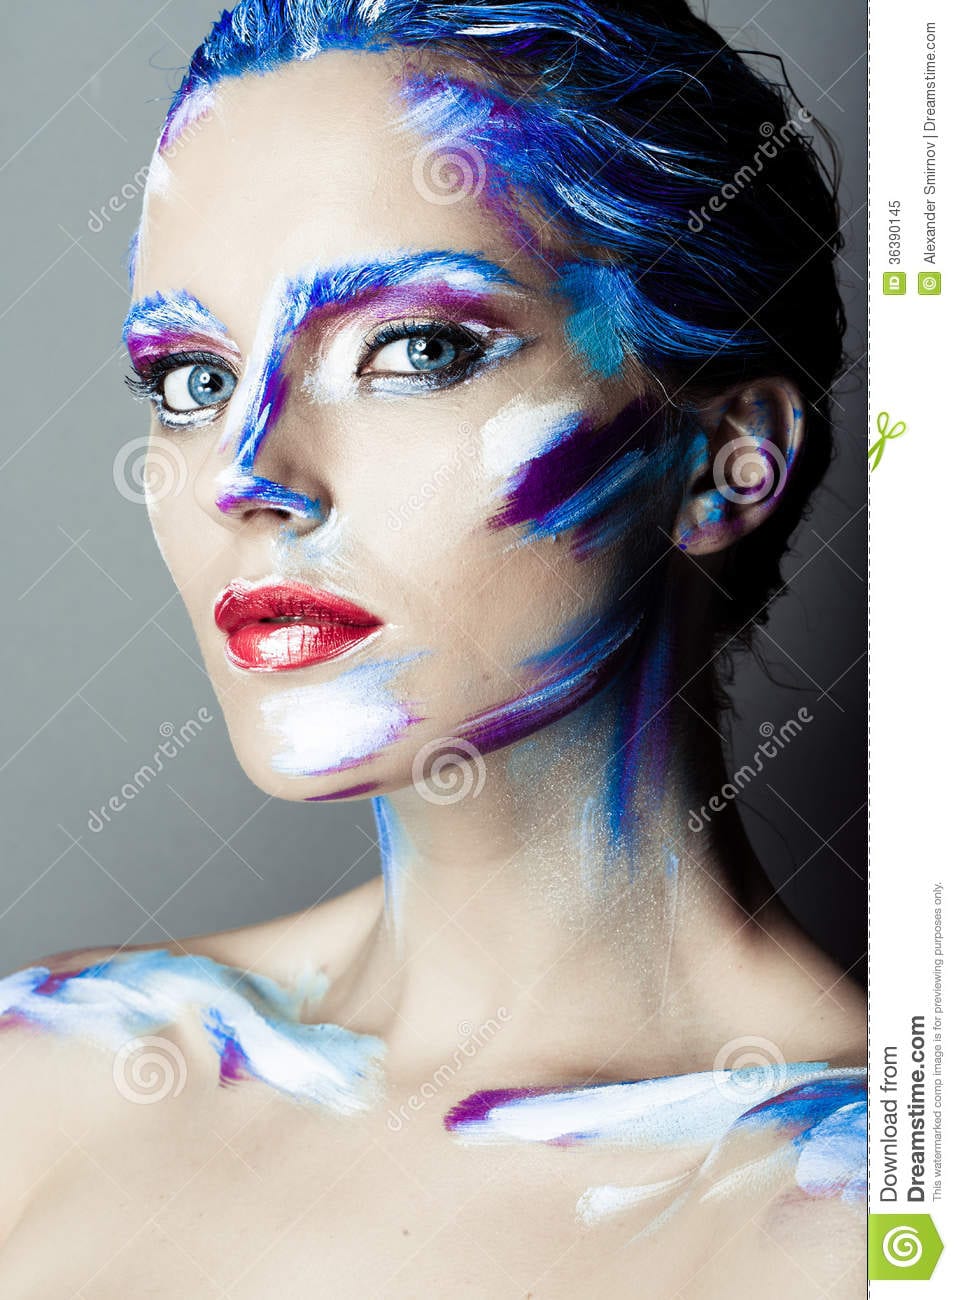
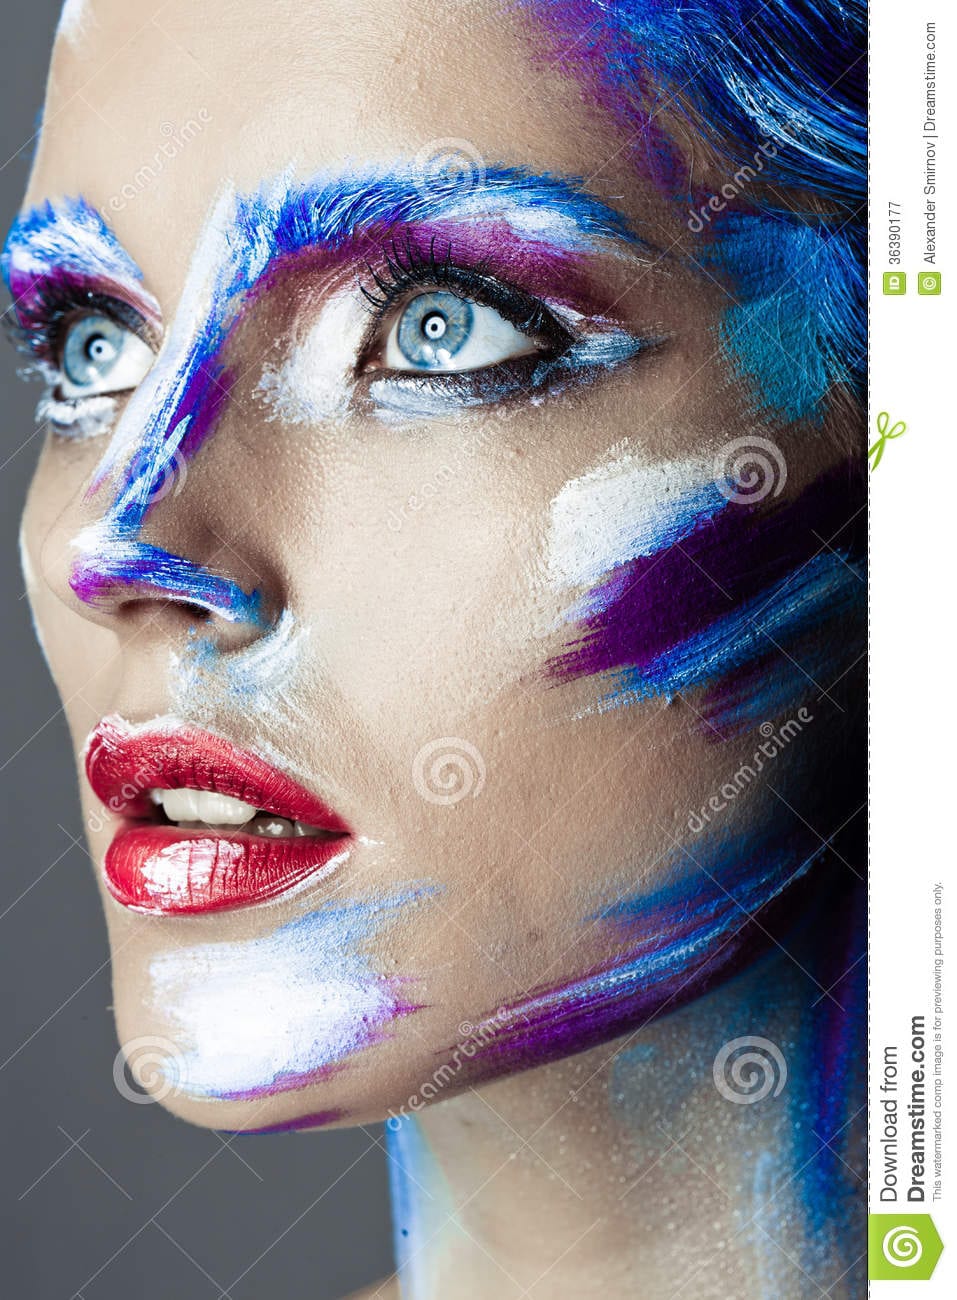

The colours work beautifully here and would allow me to experiment a lot with the lighting. The question now was to see if I could recreate the face paint on myself.
SELF PORTRAIT
The paint was somewhat successful. I used a mixture of blues, white and purples and essentially painted my face in a similar way to the photoshoot previously shown. When taking the photos, I used one spotlight and experimented with flash and without flash. I was playing with the colours, with flash I wanted the blues and purples to be vivid, however I found through several shots, the colour changed depending on the light.
I experimented with different aperture sizes but generally stuck to the same shutter speed and ISO. It was difficult to experiment as much as the last project in terms of ISO and apertures as I was in front of the camera as well as being in front so once I found the aperture that gave sufficient light exposure, I left it at that.
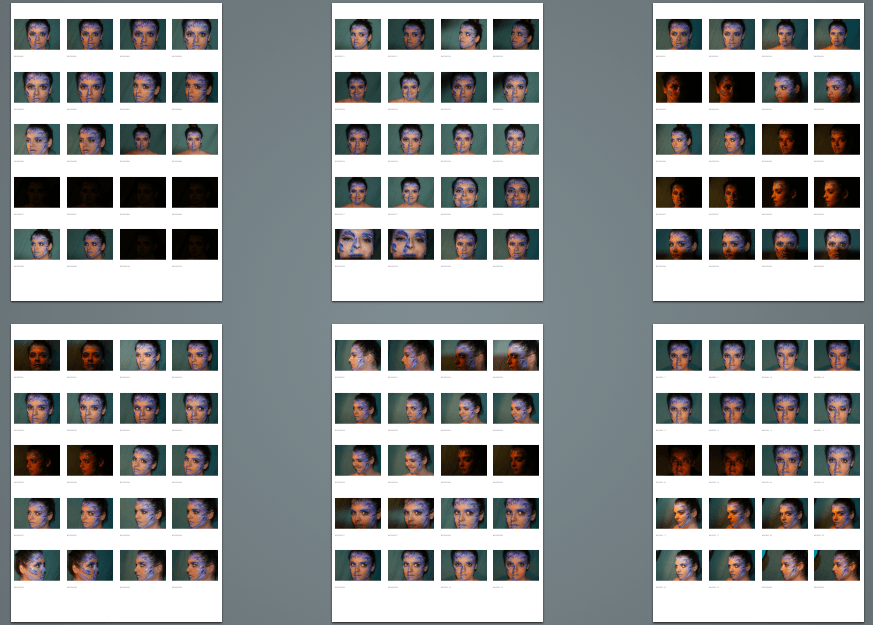
SELECTION PROCESS
Through the selection process, I chose the best images and narrowed it down to the one I would then edit and make my final self portrait photo.
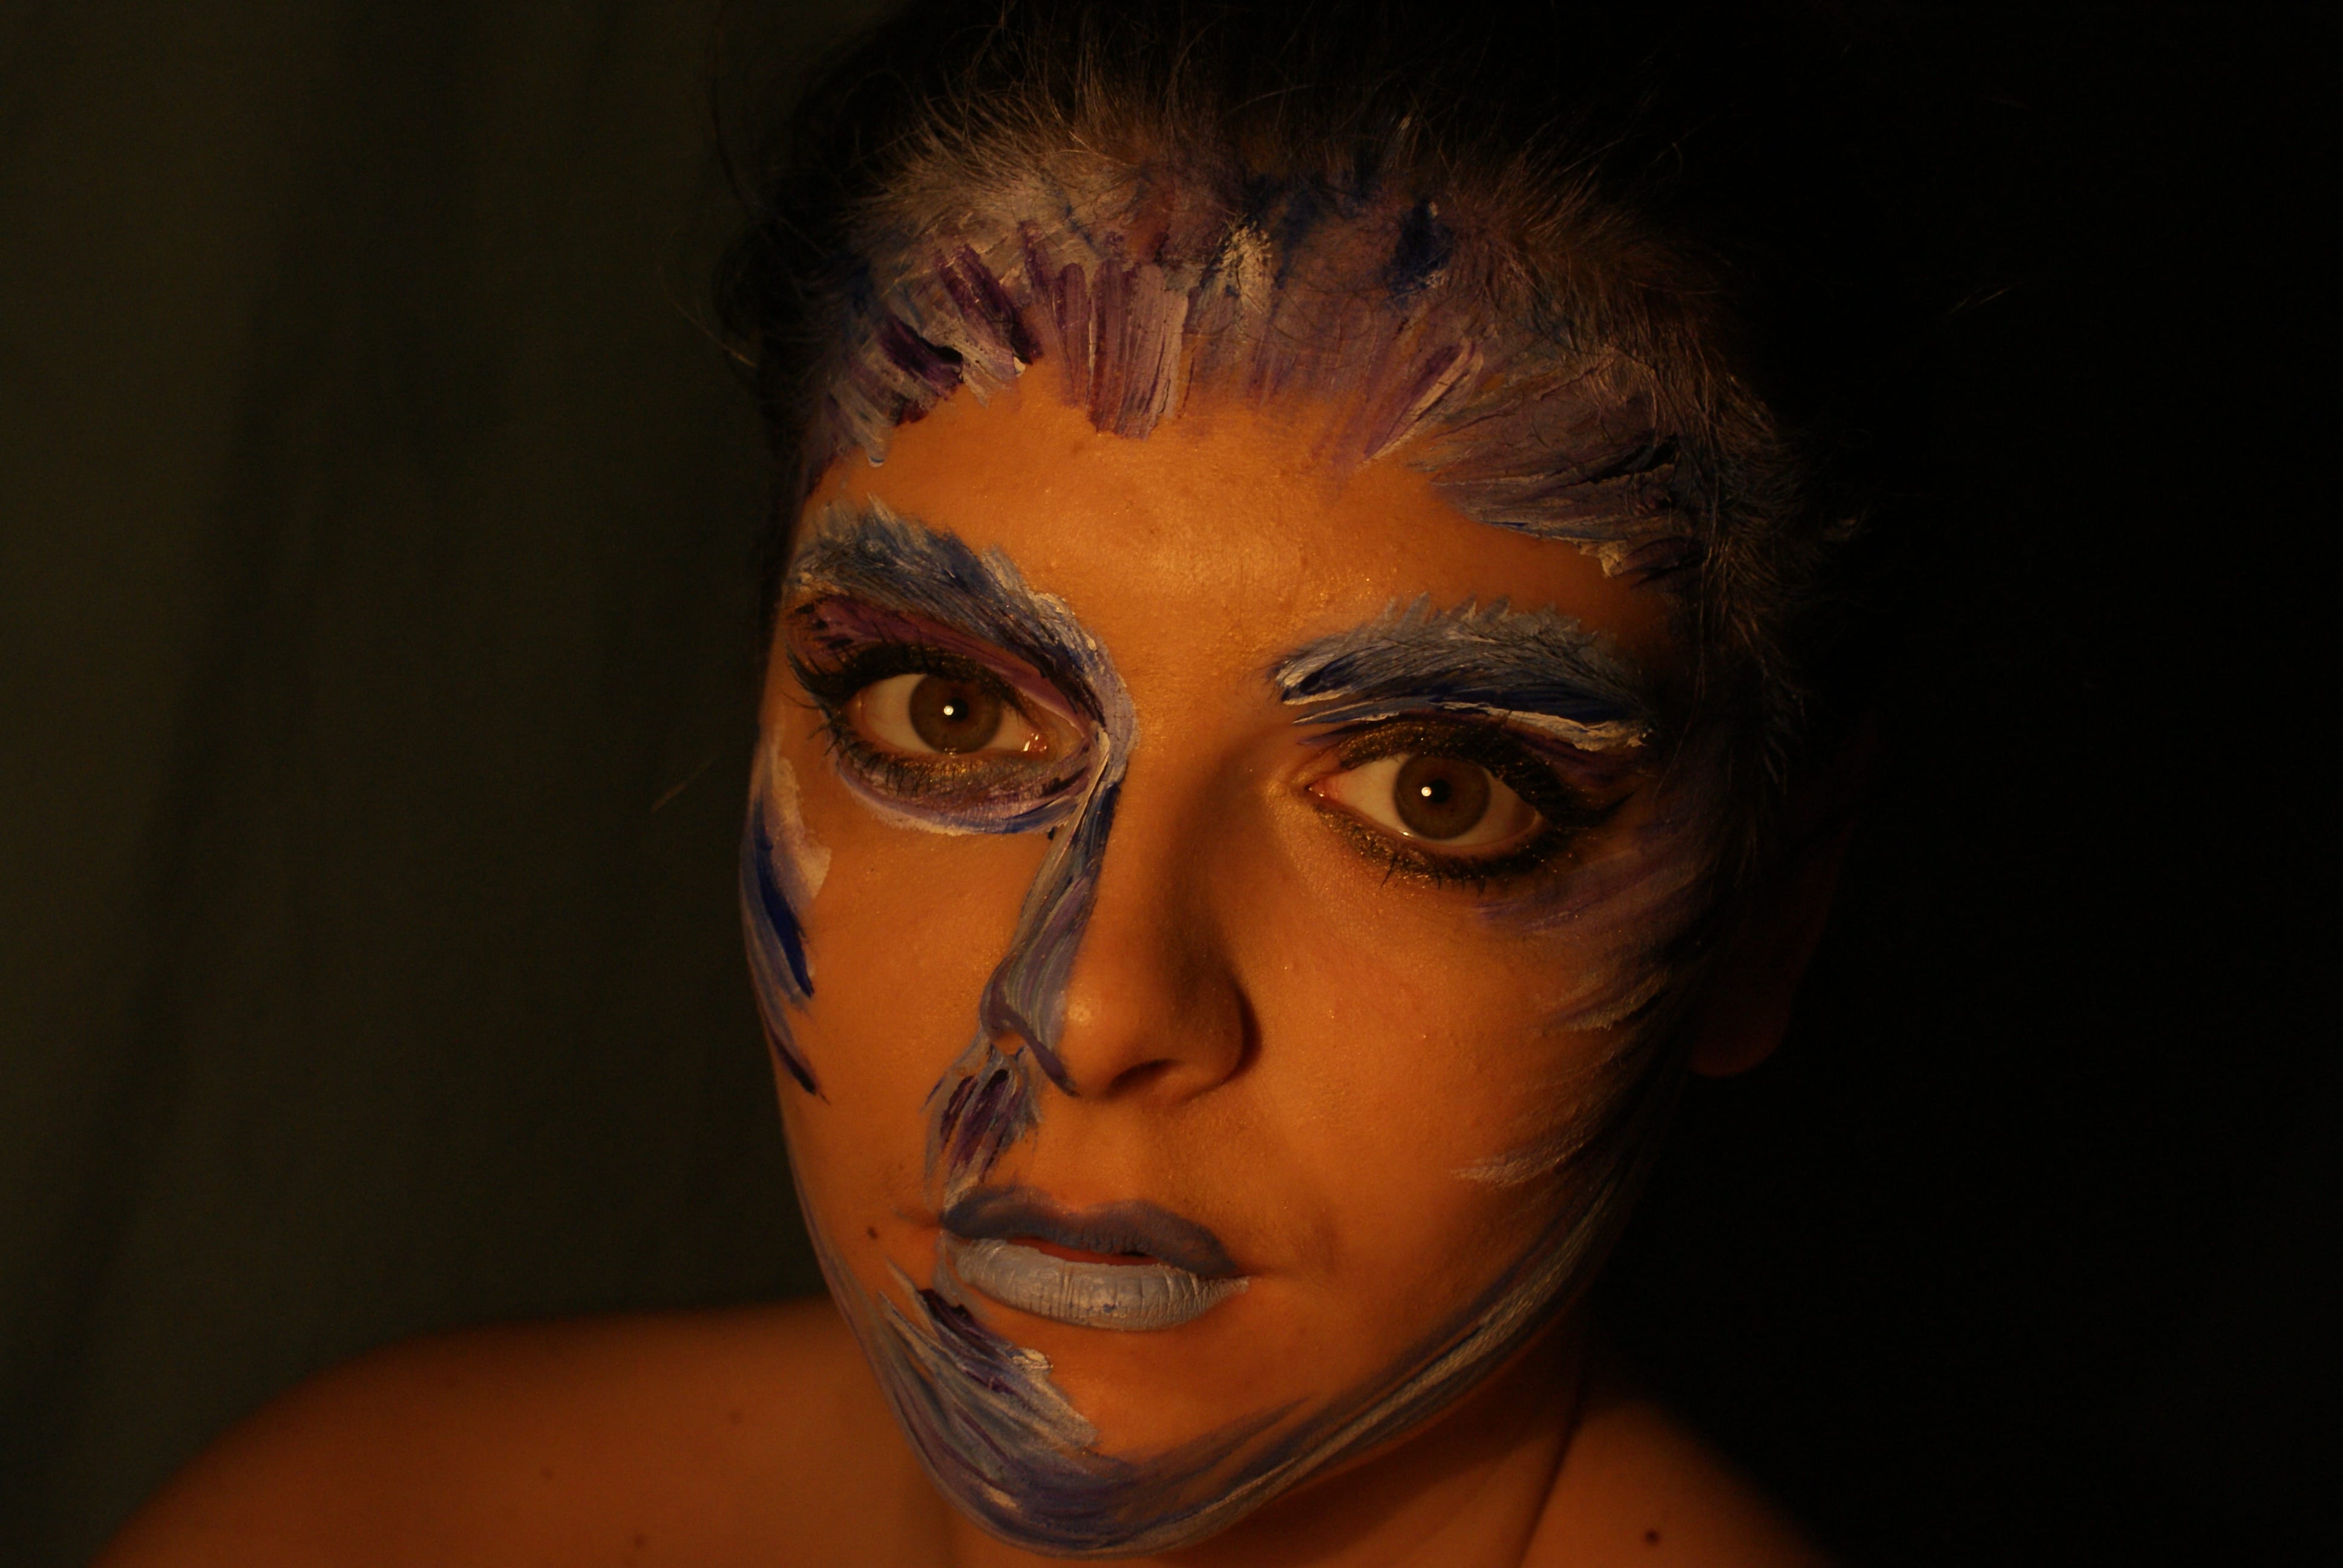
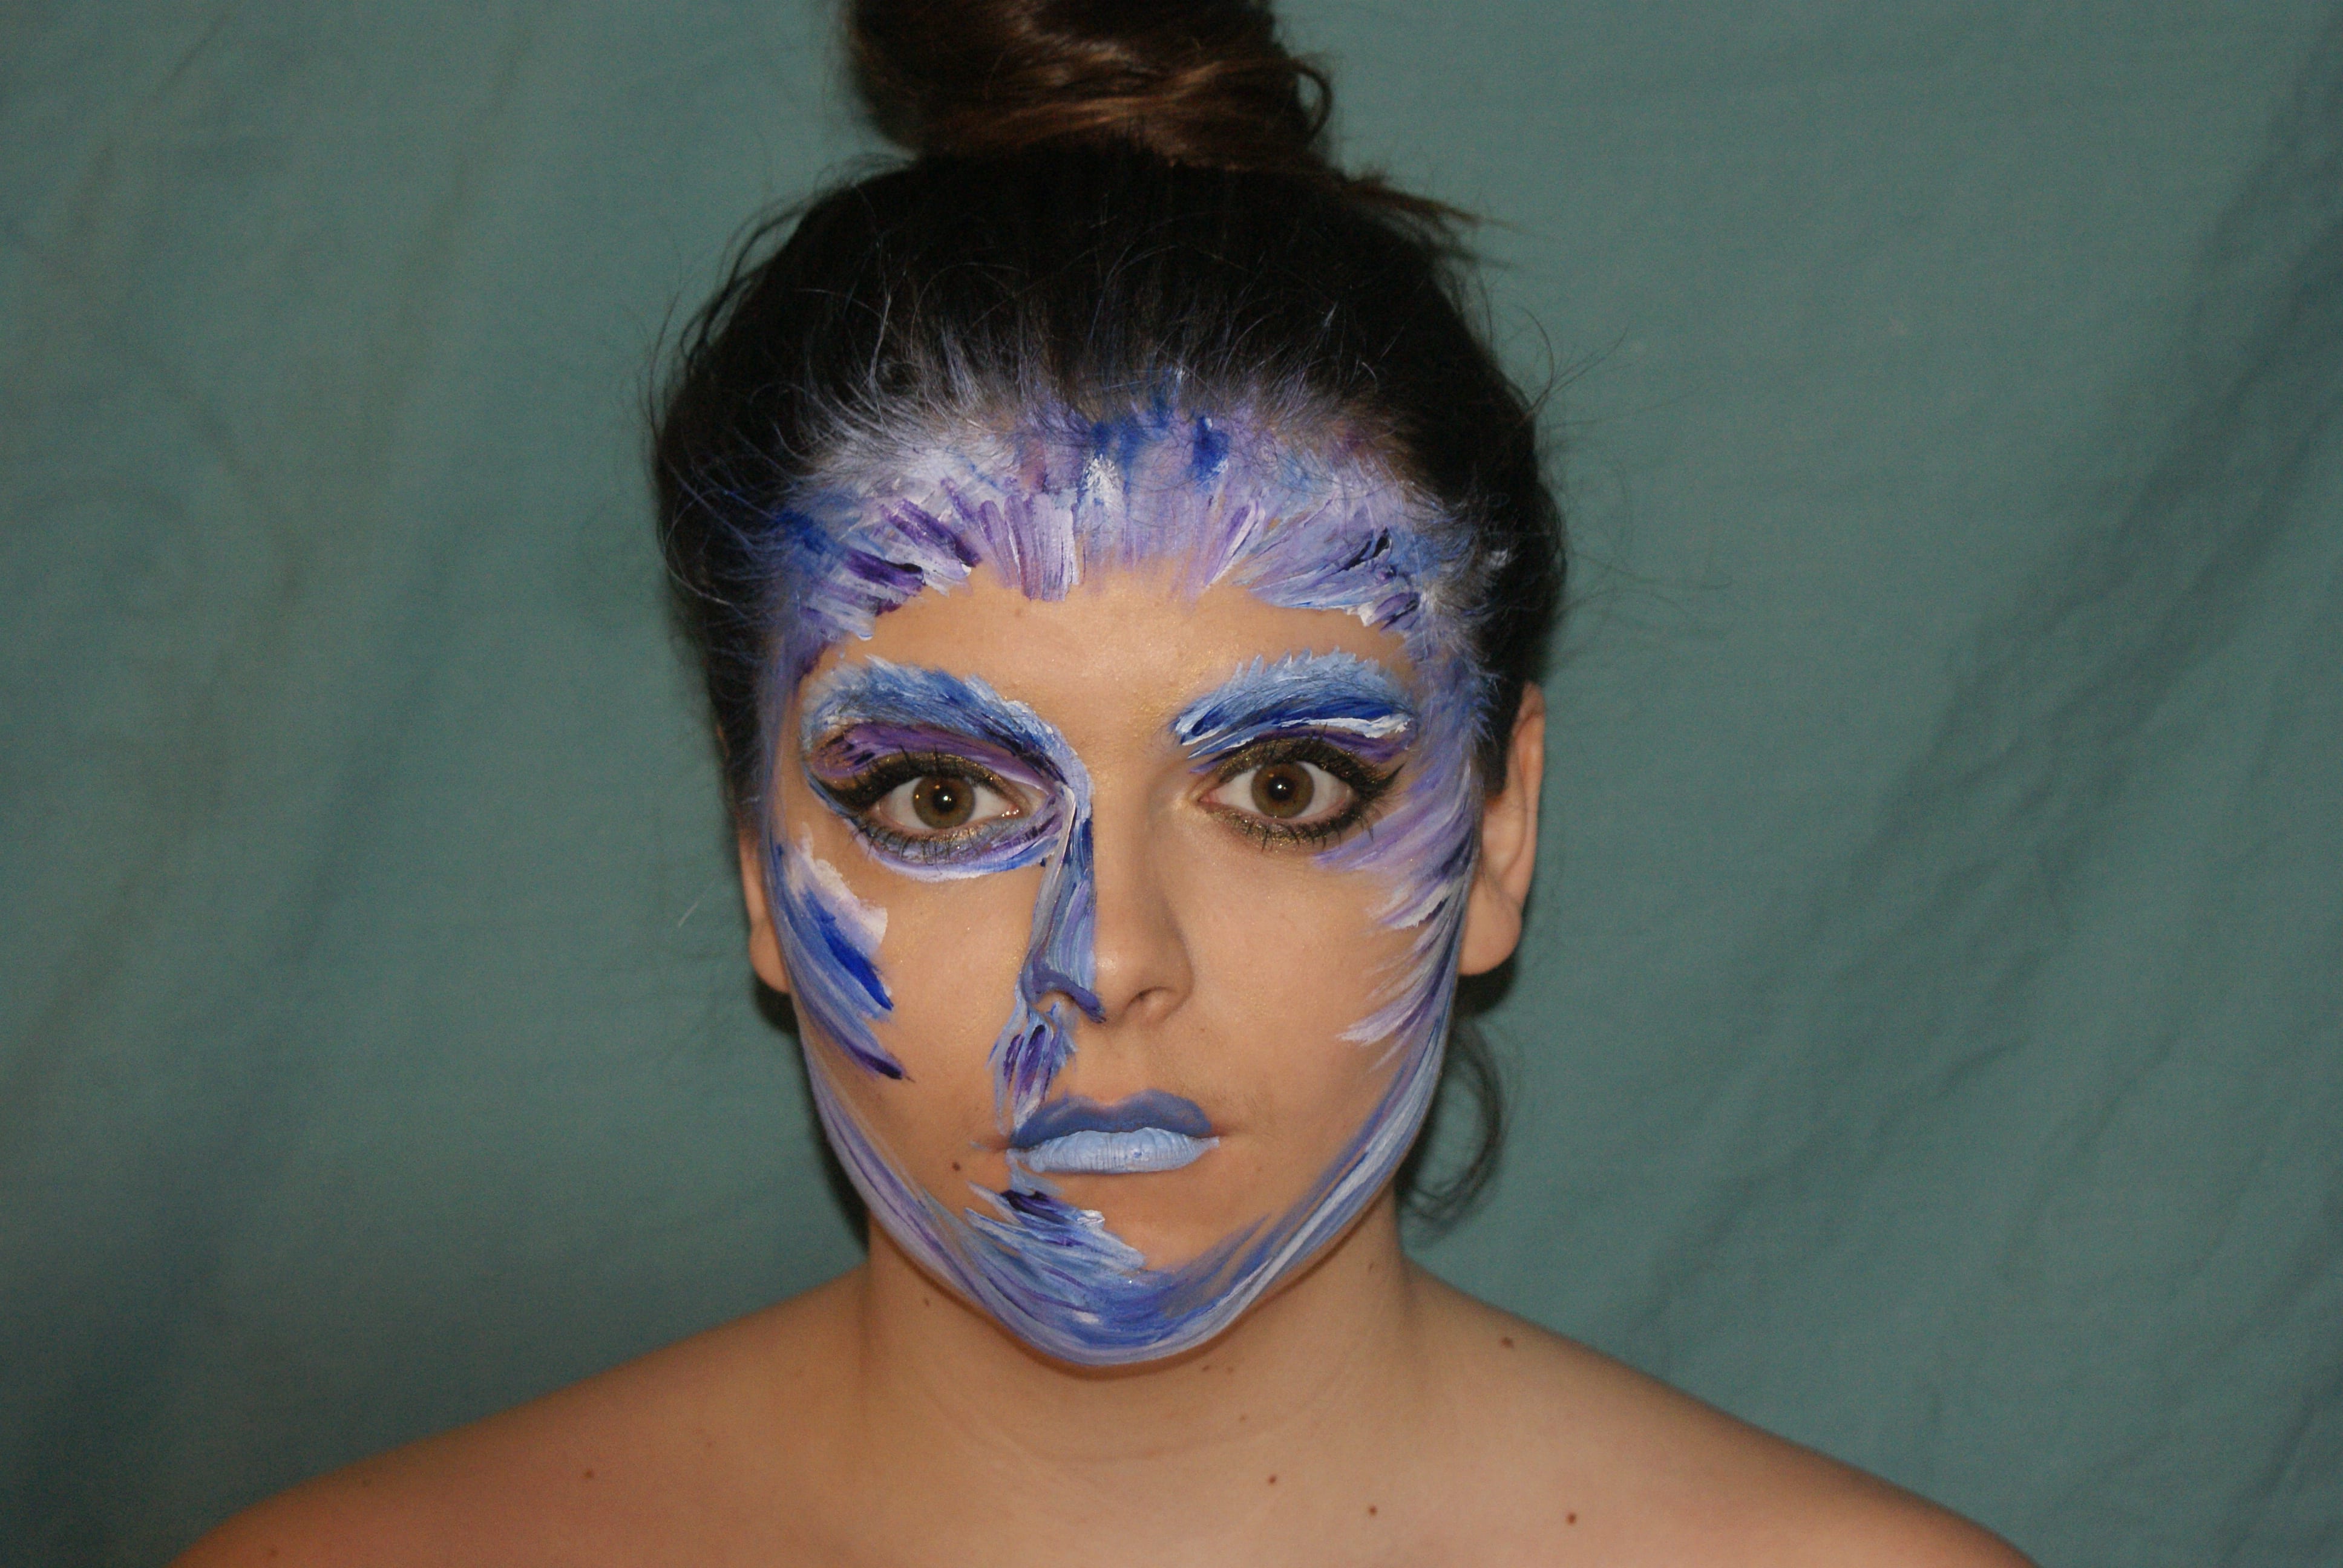 This image is very powerful and I really like how I’m looking directly into the camera, as you get a crisp image of my eyeballs. I feel like my brown eyes compliment the blue and purple really well. The photo has simple lighting coming from behind the camera with very little shadow coming onto the blue back drop. I like this as an image but think it’s too simple to create my overall message of hiding your identity.
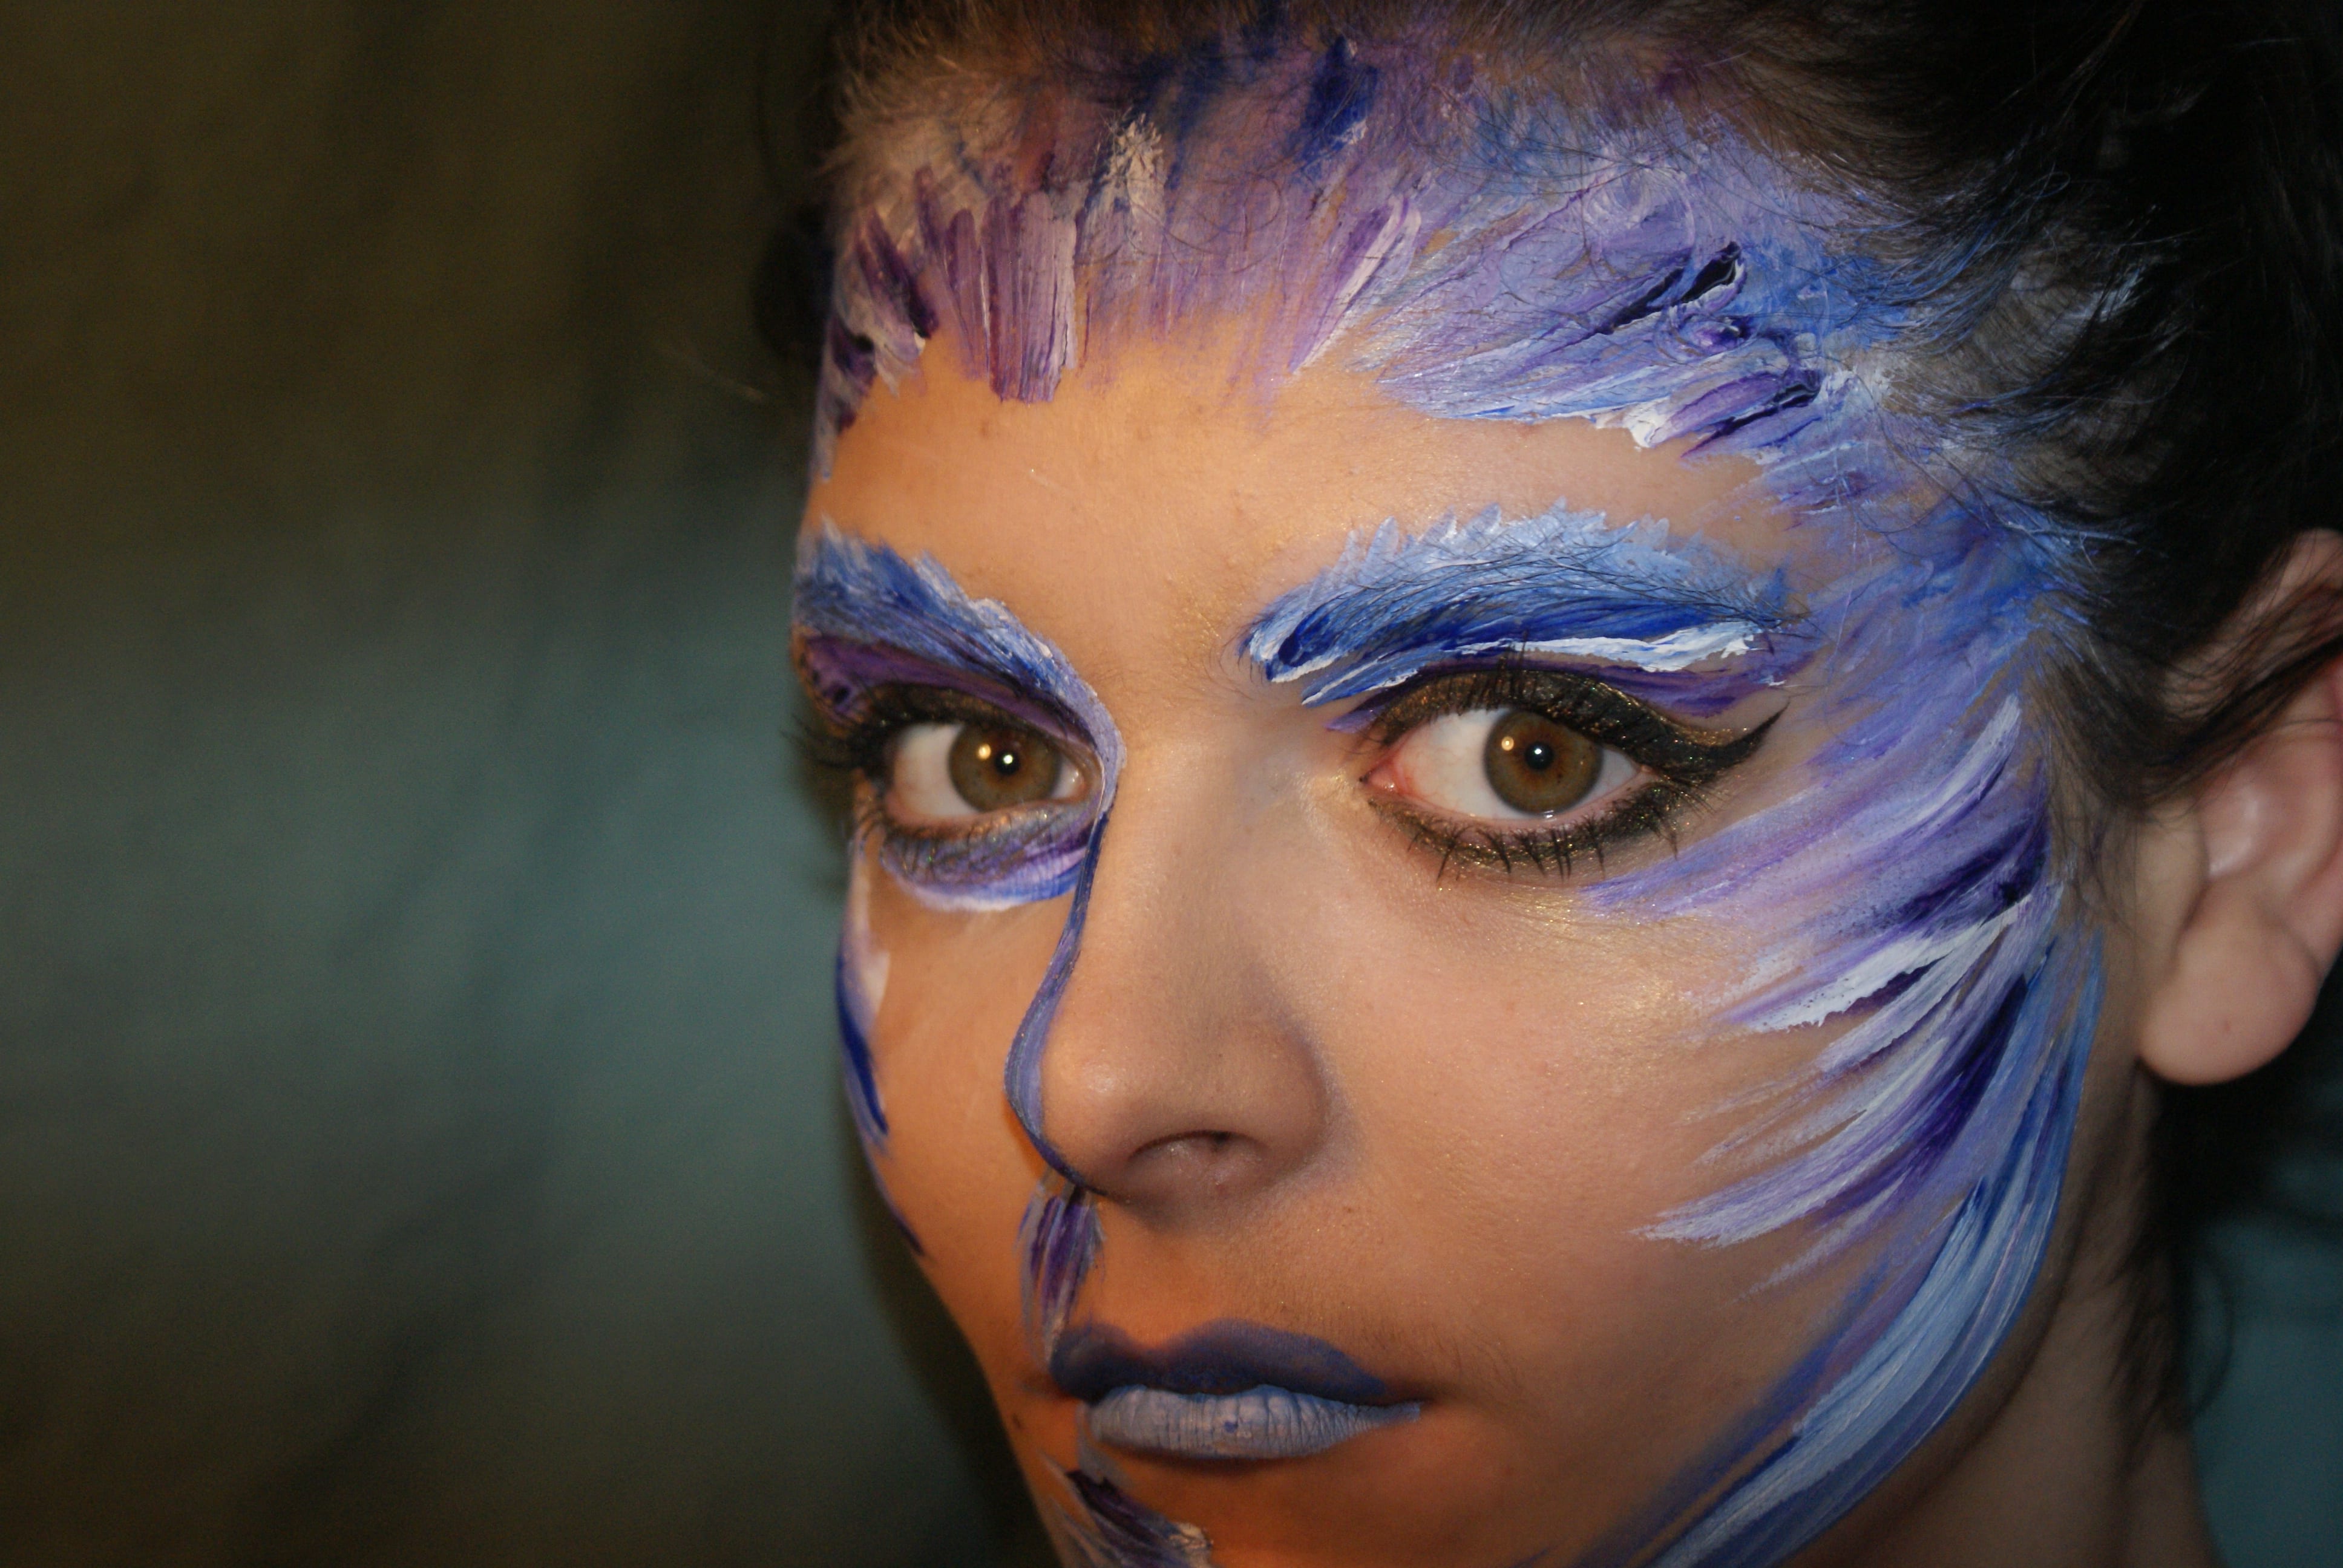 The lighting of this photo is my favourite, I covered part of the flash with my finger to enable this hidden effect. The light only hitting the eyes immediately suggests the character is looking through a gap in a wall or a letter box. My only issue with this photo is the left eye isn’t focused and then as an audience we slightly lose that connection with the characters feelings.
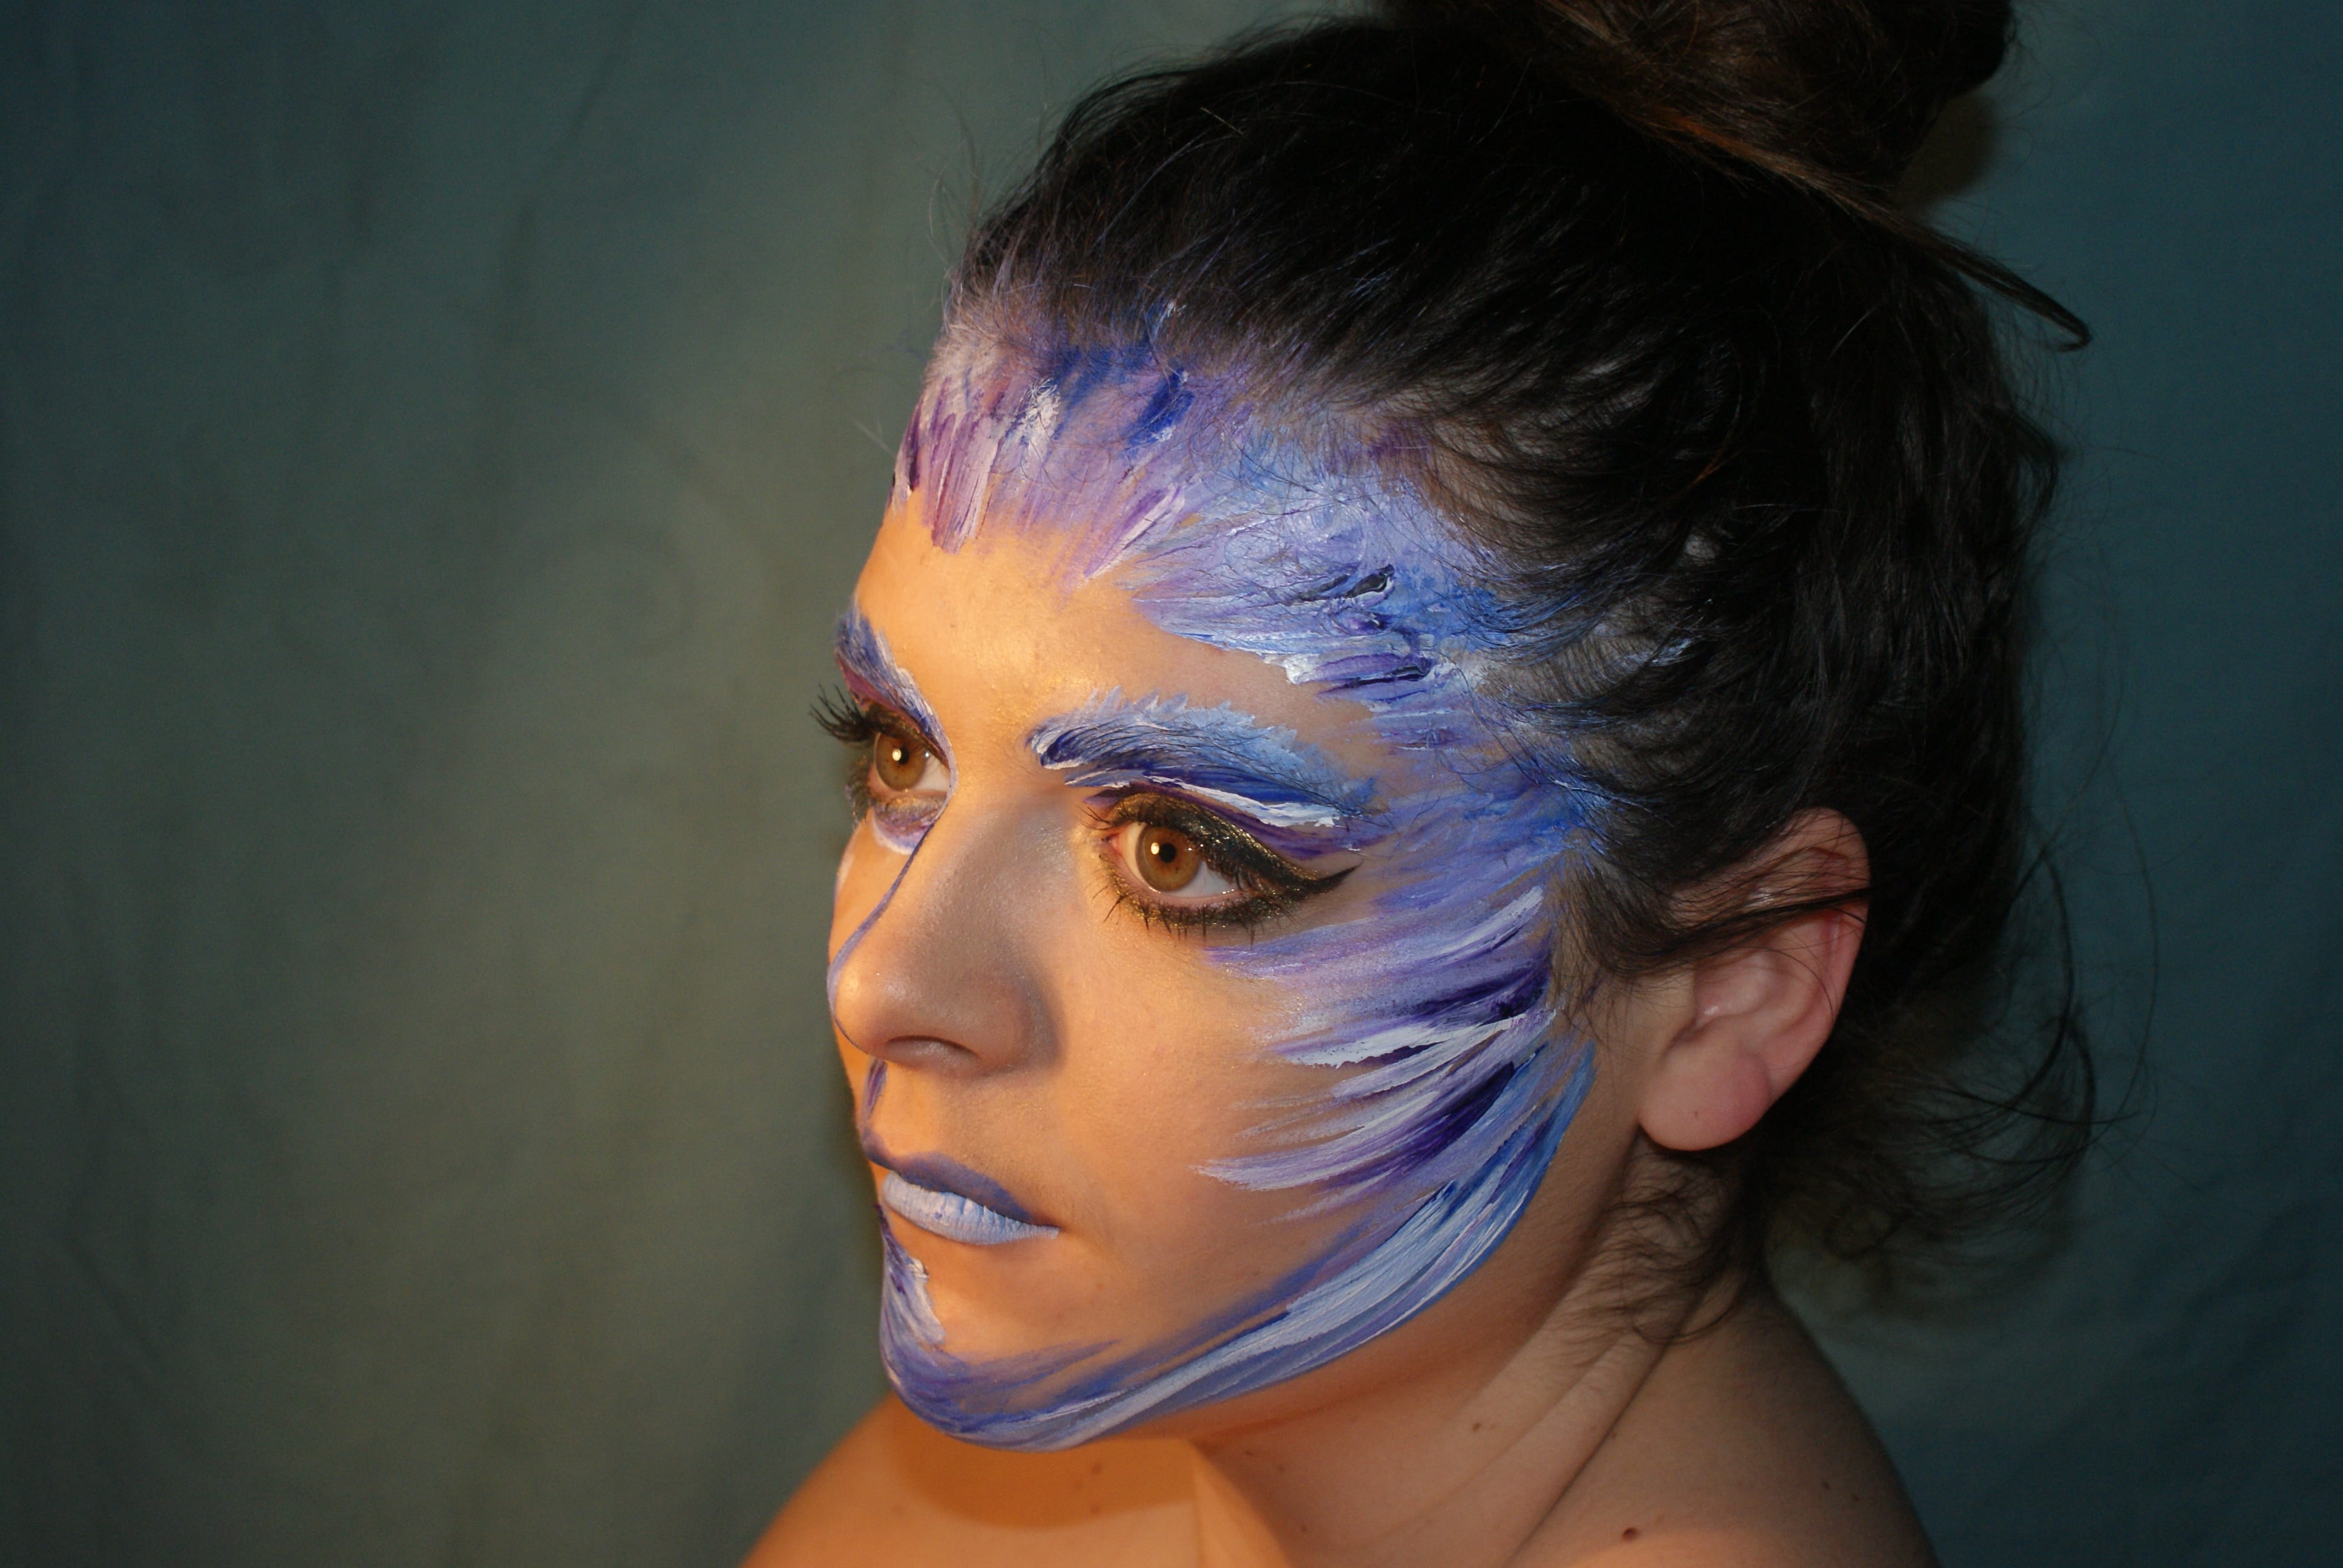
 Again, the lighting plays a huge part of this photo. The fact that the shadow behind me is larger than my body, suggests almost an unsafe atmosphere. Is she hiding from something bigger and more powerful than herself? The lack of eye contact suggests that exactly.
 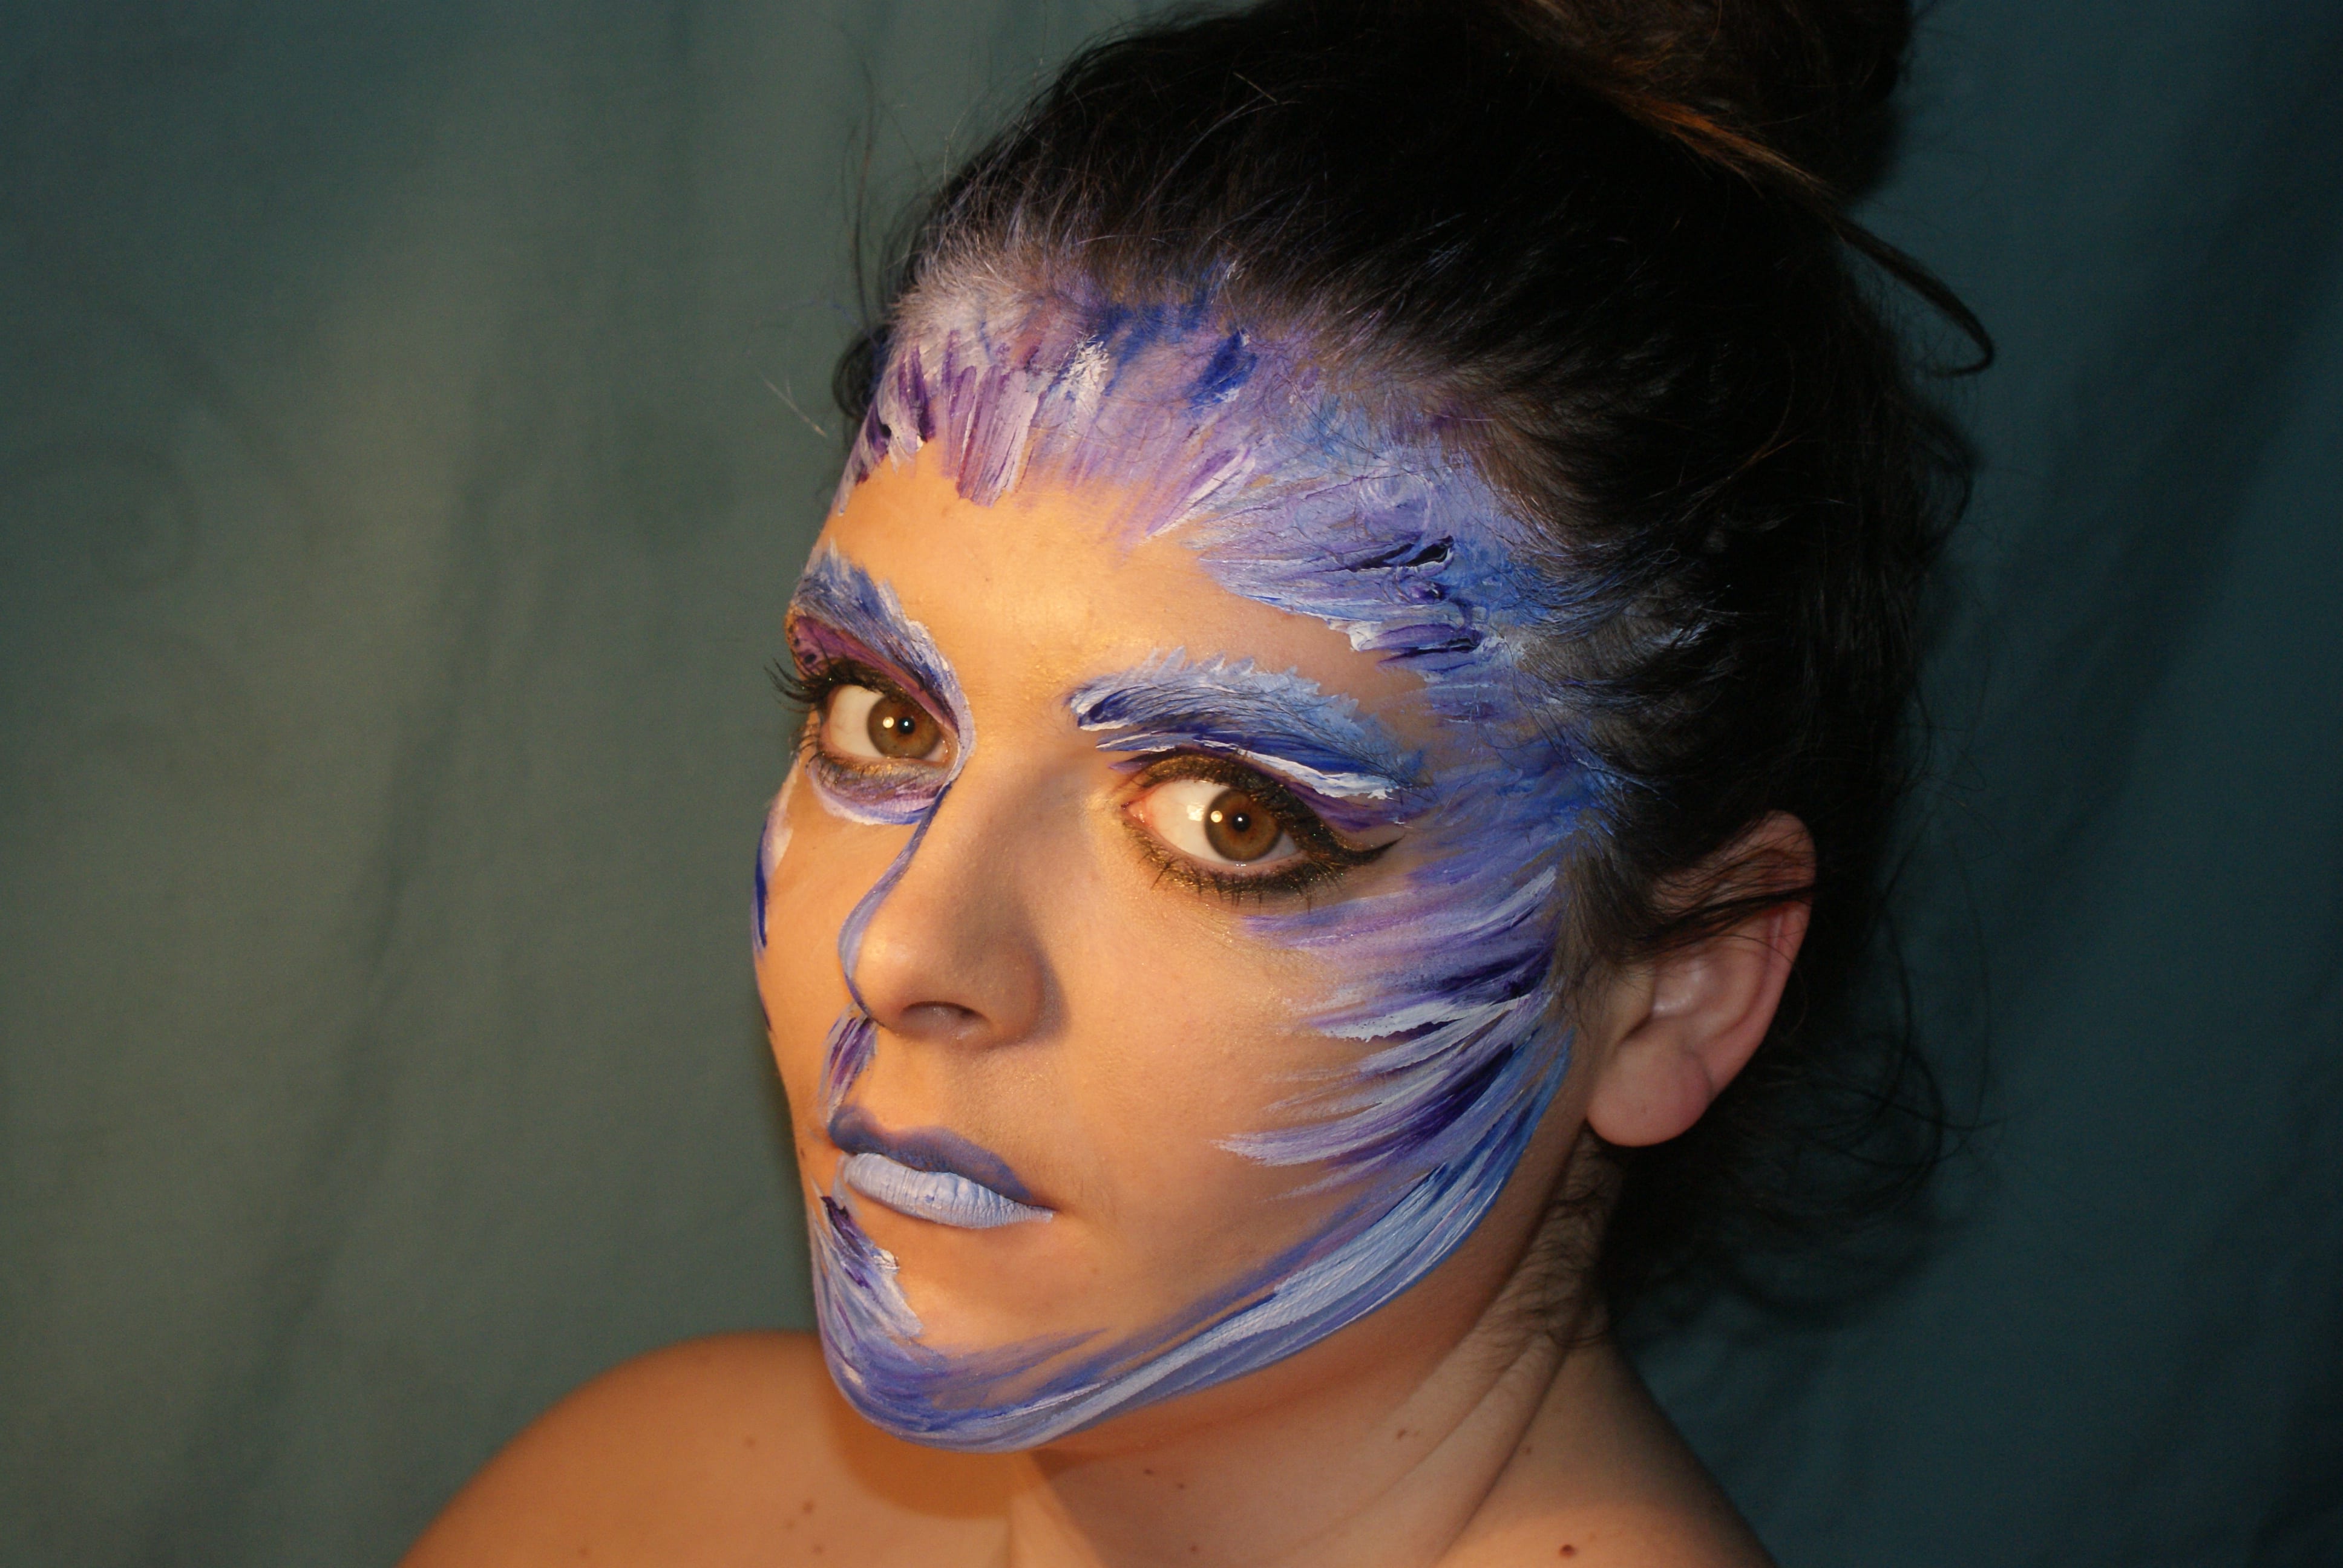 This is a good angled shot, I like the way the head is tilted slightly yet the eyes are looking directly into the camera. Again though, I’ve lost the focus on the eyes. However, I feel like this adds to the image, her eyes to me look vacant, perhaps deep pain. The lack of focus allows there to be a barrier between the woman and the audience.
 I really liked the effect no flash had on the subject, despite taking away the vibrance of the colours on her face, I think it works with the skin tone and dark background. This allows the audience to focus entirely on the eyes and what story is behind them. To me, this is the closest I got to a mask so far.
 The spotlight on the left side of the face brings out the hazel brown tone of the eyes lovely, and creates almost a cat like tone. I wanted to experiment with different angles when taking the photo and as you can see, I enjoyed the side profile the most. Possibly explaining why I chose the final image…
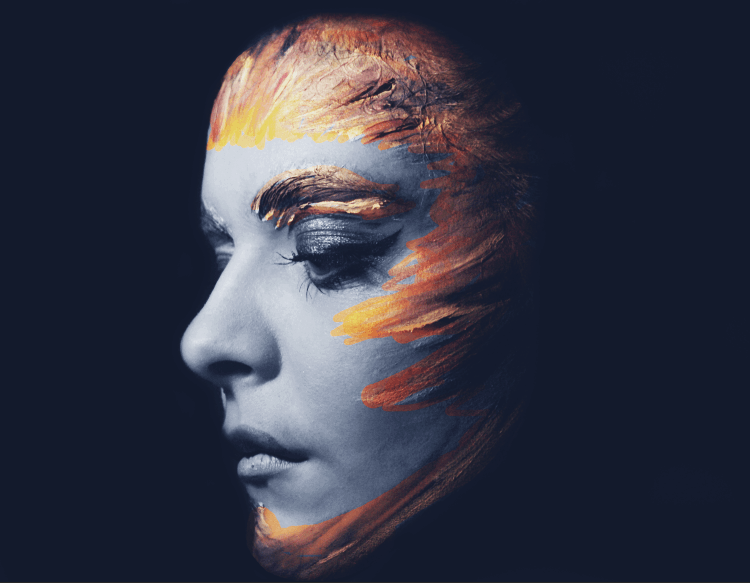
CHOSEN PHOTOGRAPH
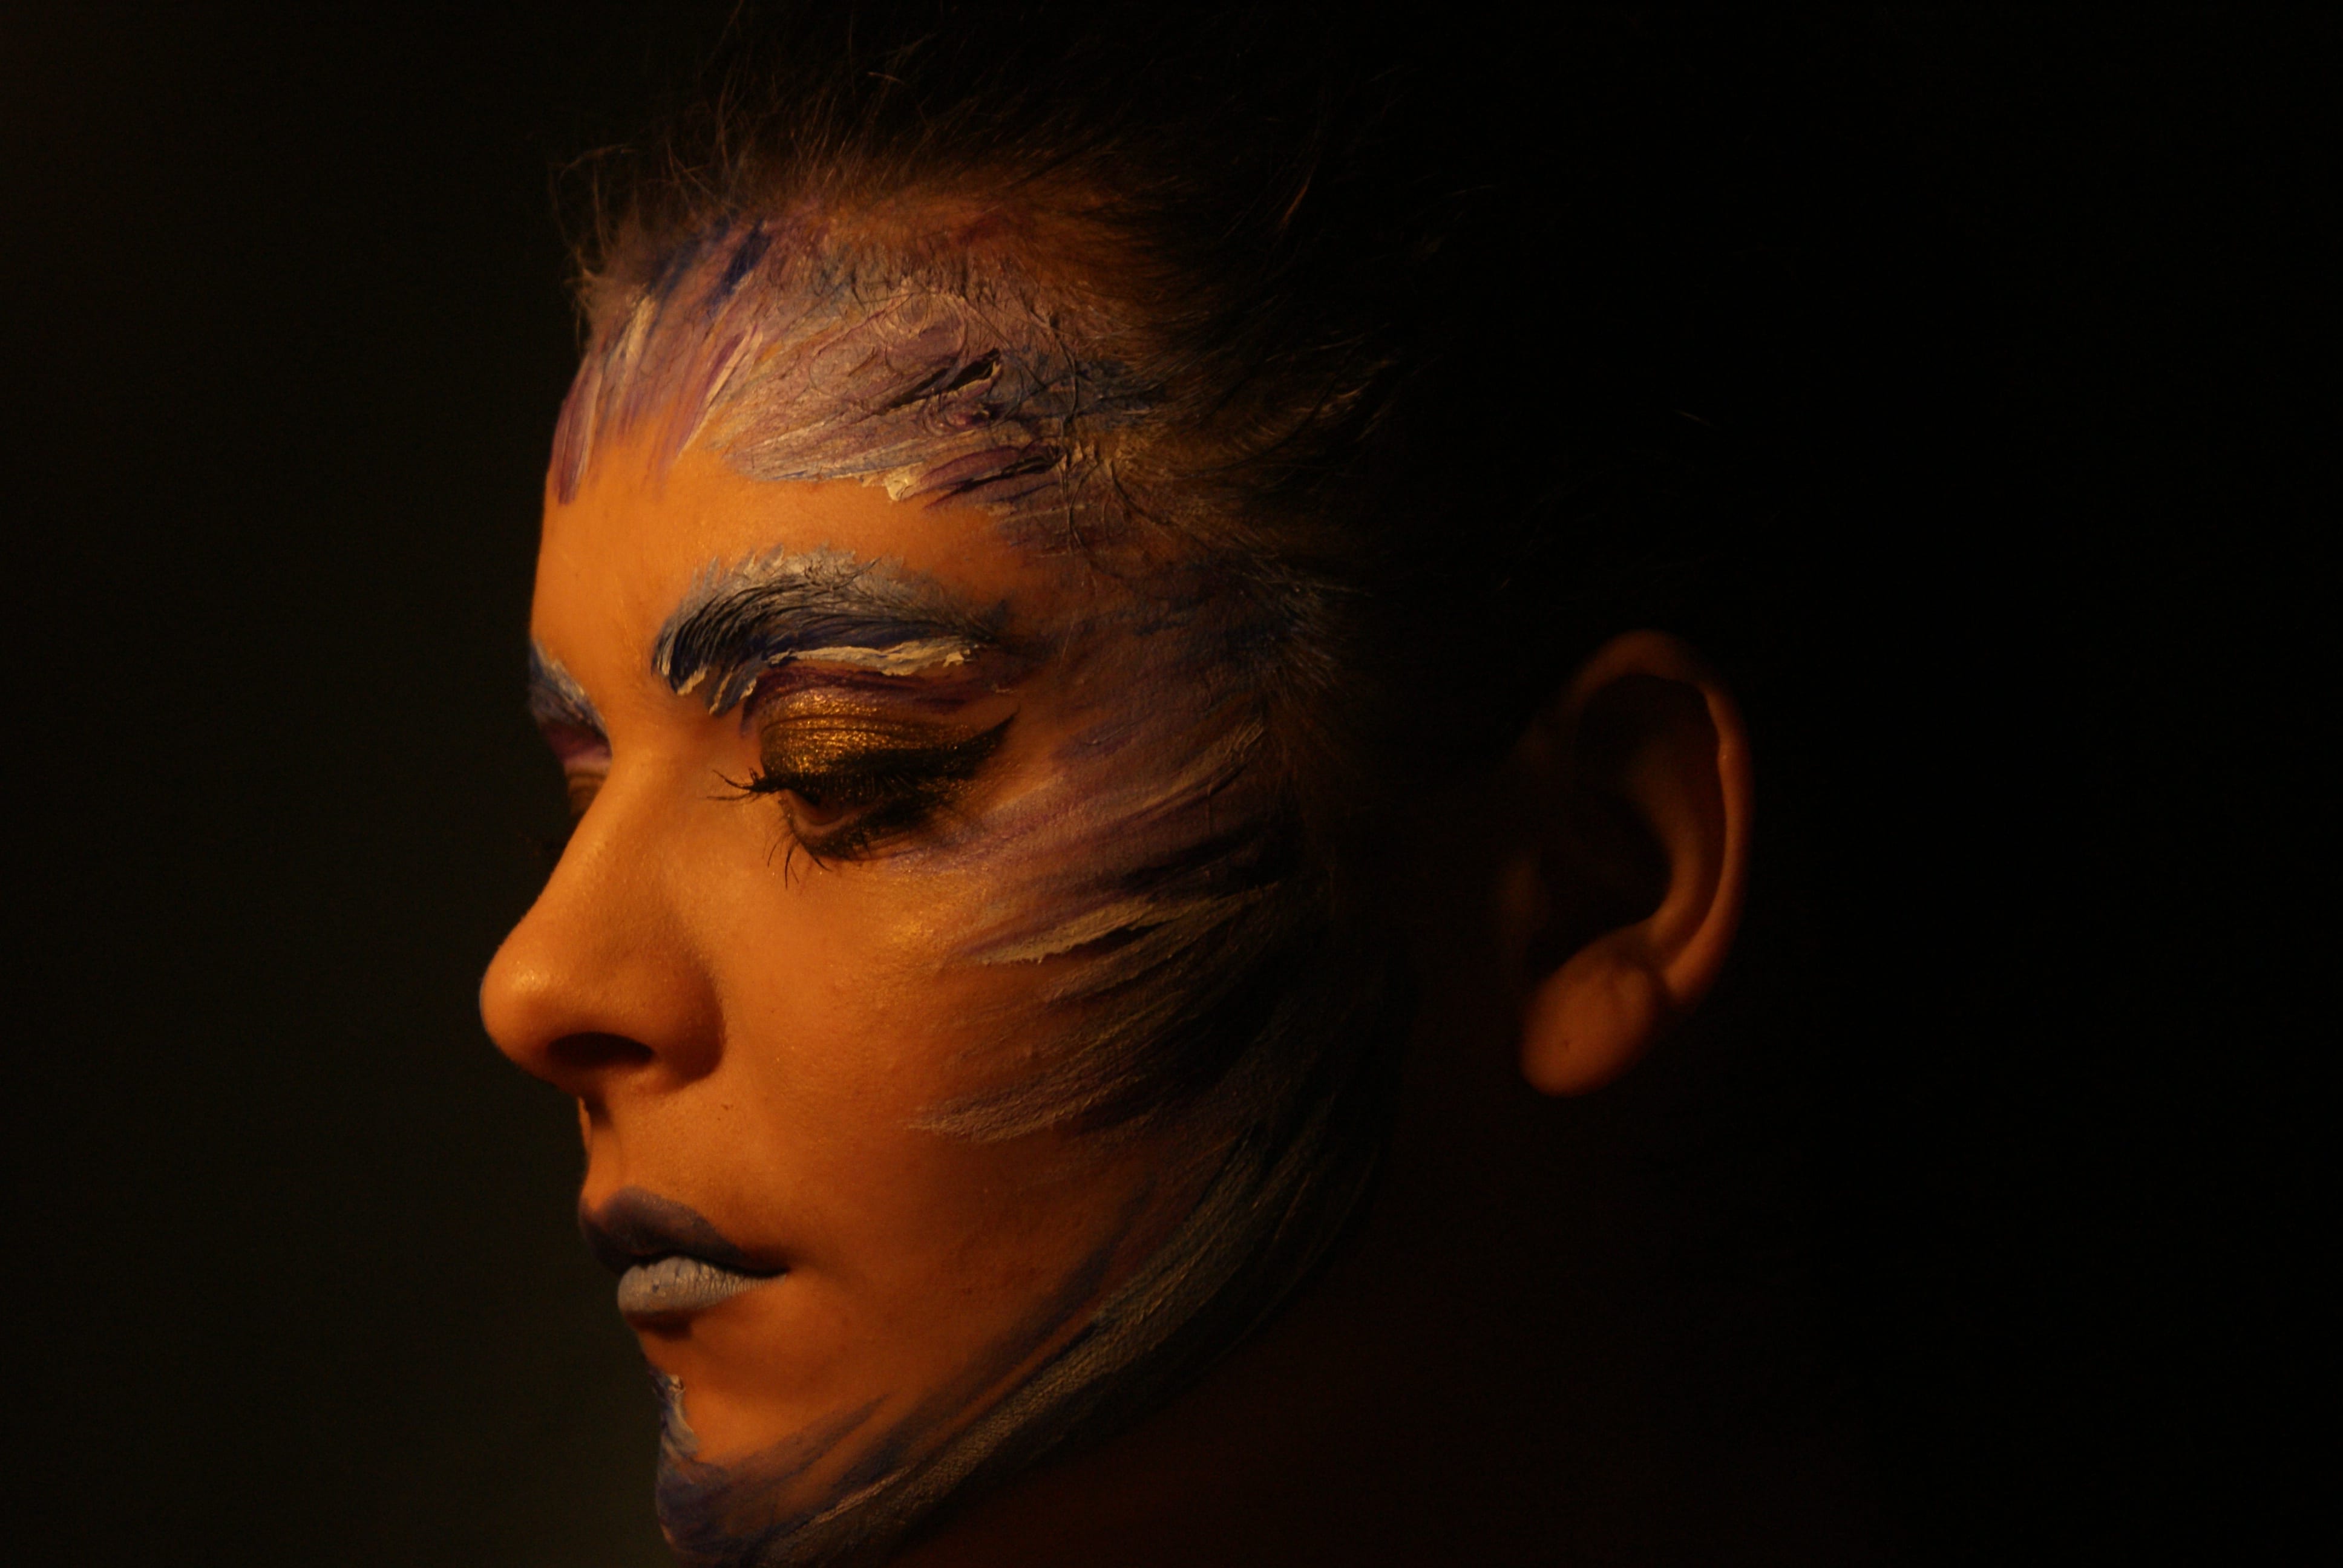
I chose to go with this photo as my final self portrait. I felt like this one had the most potential to become a mask. The side profile perhaps doesn’t give us the connection of eye contact but I think this image still holds a very strong message. The cracks where the paint has dried on my forehead reinforces the idea that it’s a mask to hide the real me but it’ll soon crack more and completely disappear. Now for the editing process….
EDITING
Once I decided on the image I was going to edit and use as my final one, I looked at the previous mask photos and tried ways to make it as similar to that as possible. For example, I needed to get rid of the hair and ear, and create a side mask profile. To do this, I simply used the black paint tool and went over the bits I didn’t want to see in the overall image. I then painted the rest of the background so all we could see was the outline of my face.
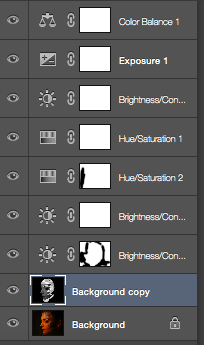 After this, I adjusted the colour balance to make the colours on the face more like flames, dismissing the blue and purple entirely as I liked the idea that the flames were making the mask disappear.
I then adjusted the exposure to make the overall image slightly brighter, leading onto brightness and contrast to make the colours more appealing to the audience.
The hue and saturation were adjusted also, to enhance the colours and experiment with different colours.
After basic adjustments, I went on to add to other parts of the photo like brightness/contrast to enable it was exactly how I wanted it to be.
I then decided that the colour was such a huge part of the image (that being the mask) that I wanted to desaturate the image and paint the colour back on. I wanted the oranges and reds to be the first thing that empowers the audience.
FINAL SELF PORTRAIT
Overall, I love this self portrait. As previously explained this is not something I had done before as I belong 100% behind a camera. But it was a fun experience and actually easier in many ways because I just needed to direct myself. I wanted to do something different with it and explore messages that can be shared through self portraiture, instead of just taking one of me smiling…
Everyone around us wears masks all the time (not in a literal sense) but without even thinking about it. I’m different around my friends to when I’m around my mum. I’m different when I’m in a nightclub to when I’m at a job interview. Only when it’s me behind my bedroom door, is when my masks are taken off. And what I’ve discovered doing this project is that everyone is the same. So I guess the message I’m trying to portray through this image is that, wherever you are, just remember the real you behind that mask.